How to organize PDF documents with tags in SimplePDF

As your Documents Dashboard grows, finding the right document gets harder. Tags let you categorize documents by project, client, department, or any label that fits your workflow.
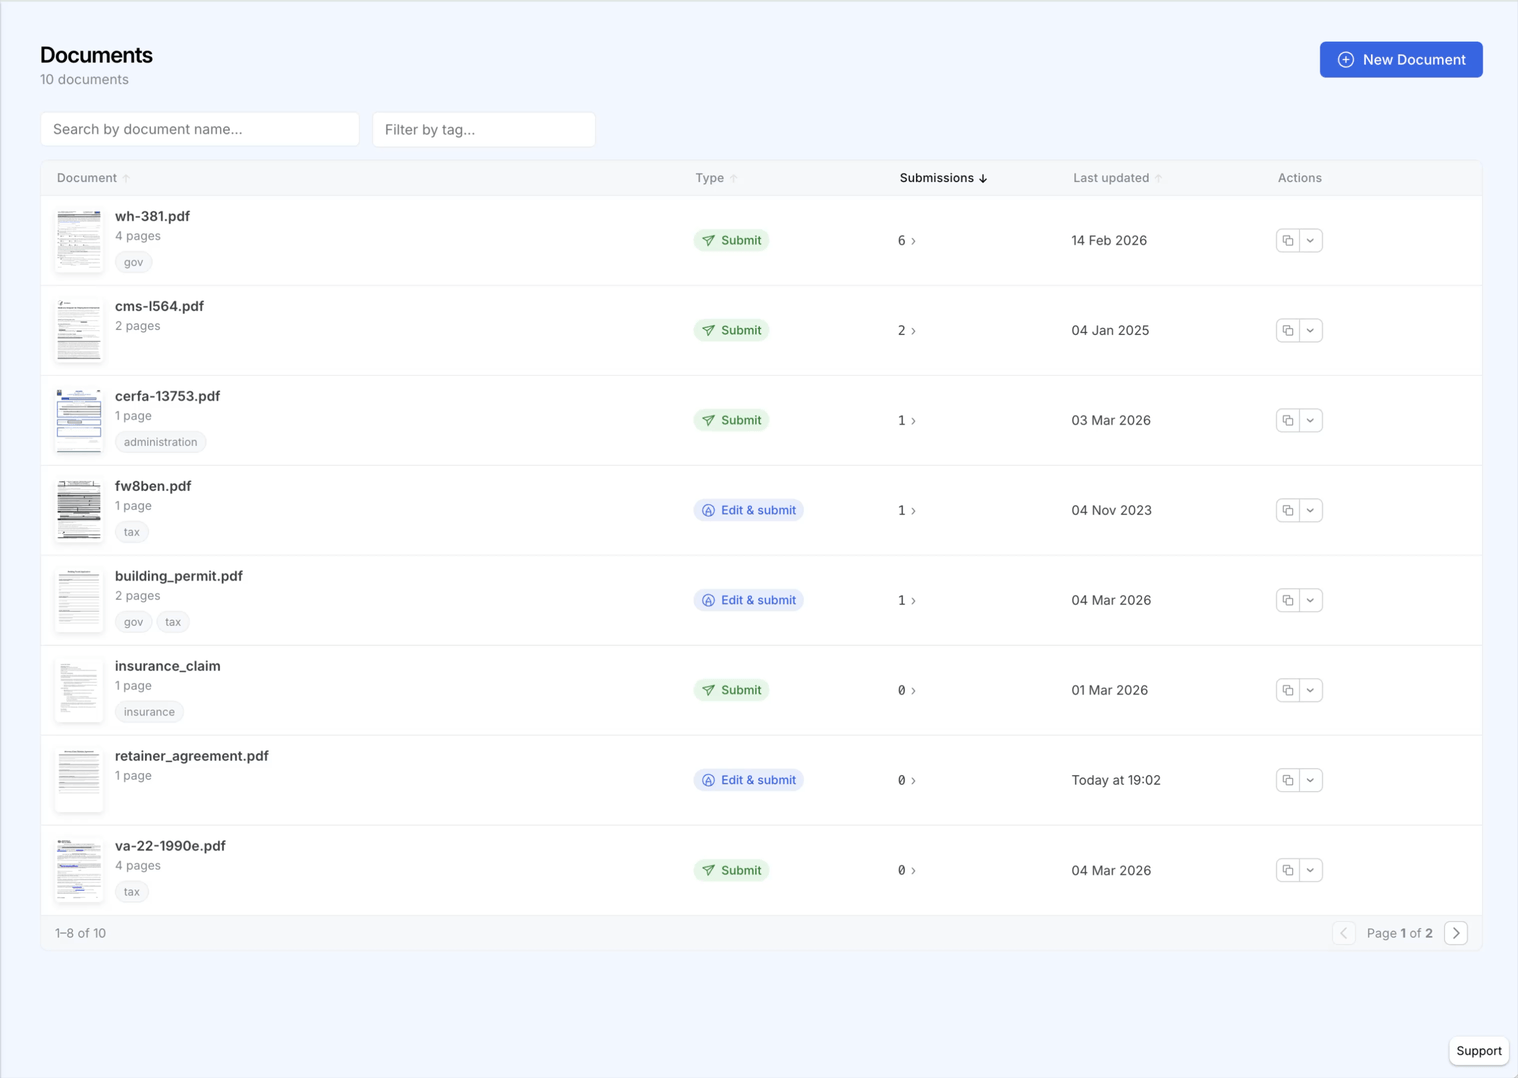
Adding tags to a document
- Go to your Documents Dashboard
- Click the settings icon on the document you want to tag
- In the settings drawer, find the Tags field under the General section
- Type a tag name and press Enter to create a new tag, or select an existing one
- Add as many tags as needed
- Click Save
Tags are company-wide: once created, a tag is available for all documents in your account. You can also add a tag directly from the table by clicking the + button next to a document's existing tags.
Filtering documents by tag
There are two ways to filter by tag:
- Toolbar filter: Use the tag filter in the toolbar above the documents table. Select one or more tags to show only documents that have those tags.
- Click-through: Click any tag pill displayed on a document row in the table to instantly toggle filtering by that tag.
Search and tag filters work independently. When both are active, documents must match the search query and have at least one of the selected tags.
Tips
- Categorization patterns: Use tags for projects (
project-alpha), departments (legal,hr), document status (needs-review,approved), or clients. - Free on all plans: Tags are available at no cost, regardless of your plan.
- Combine with search: Narrow results by searching within a tagged subset of your documents.
That's it! Your documents are now organized with tags, making them faster to find and manage.
If you have any questions, feel free to reach out to support@simplepdf.com